Battle for Middle Earth - Faction - MordorThis is a hint/walkthrough post for
Battle for Middle Earth. You can find
an index of all our Battle for Middle Earth posts here.
OverviewMordor is a very disappointing faction to play in the Campaign because it can be really hard to level up the cool monster units and keep them with you from mission to mission. The only unit that has any real cross-campaign survivability is a combined Orc Warrior-Orc Archer Horde at a combined cost of 50 Command Points per Horde.
The Banner upgrade is available at both the Orc Pit and the Haradrim Palace, but you only need to choose it once at either place, and it will be available for all applicable units.
Mordor is also very hard to play if you want to retain veterancy of your units because if you engage a large force of the wrong type of unit, you will probably lose your own. Archers (especially with fire arrows) will slaughter your Mûmakils and Trolls. Cavalry of any kind can potentially wipe out all your orcs. And your Haradrim are vulnerable to attrition because of their small squad size and lack of healing (except through Veterancy) for evil factions. In all cases, it is very hard to withdraw your forces in time because of the longer range of enemy archers and the speed of enemy cavalry.
HeroesNazgûlVery vulnerable to arrows and fire, and weak against Giant Eagles.
They are also one of the few units that can attack a Gondor wall tower: All other factions have wooden towers and are vulnerable to regular attack. Gondor's stone towers (on the walls -- not those inside the base) typically require a siege engine to take down.
GollumIn the Evil Campaign, you only get to play Gollum briefly, during the Cirith Ungol mission.
UnitsOrc WarriorsIn the early stages of a map, build an Orc Pit first unless you are already at your Command Point Limit. Follow with a Slaughterhouse because in the worst case, you can build Orc Warriors (they cost no resources) and send them into the Slaughterhouse for resources.
For free units, they are remarkably hardy. They are very expendable and can be sent to the Slaughterhouse to get Resources. Use Shift-Click to queue or un-queue groups of 5 (you can queue a maximum of 20 builds, including upgrades, in a single building).
As they are free, you can have Orc Warriors use their Bloodthirsty power on each other. If you have the Eye of Sauron or a Drummer Troll, they can get experience very quickly and in this way you can bring them up to level 2 with time instead of Resources. Once you merge them with Orc Archers, the entire merged Horde also becomes level 2 (but all experience is reset to 0, no matter how much you had during level 2).
Orc ArchersIncredibly fragile in melee, so you are pretty much forced to protect them by merging them with Orc Warriors, which will helpfully try to position themselves in front. This is the only true combo in the Mordor army, and possibly the one with the best long-term survivability for accumulating veterancy at a combined 20 orcs per battalion.
Haradrim LancersThe main advantage of the Lancers is the incredible amount of damage they put out per lance throw. Once your Orc Archers get the Fire Arrow upgrade, however, this advantage is considerably muted unless the target has Heavy Armor (which negates fire damage).
What makes Haradrim Lancers more or less useless is the fact that they are only 5 men per squad and need to be protected against tramples, which you can't really do easily as you can't merge them with Soldiers of Rhûn. Long-term unit survivability depends on having survivors in a unit to respawn, and Haradrim Lancers don't have enough numbers to survive a pitched battle without your losing whole units. And even losing two or three will render the unit out of combat until it can respawn fully -- which can take a long time.
Soldiers of RhûnAt only five men per squad, this unit is vulnerable to being wiped out and not respawning to fill their ranks. Other than this, they are average against infantry but very strong against archers and cavalry, especially in their defensive formation. They have a lot of Health to start, and therefore good overall survivability for just 5 men per squad -- but only against small numbers of the enemy. Against larger numbers, individual squads will get wiped out, and you therefore face attrition. As they can only be recruited from a level 2 Haradrim Palace, you will also have to pump out several units of Haradrim Lancers, and somehow get rid of them if you are at your Command Limit, before you can recover your complement of Soldiers of Rhûn.
Soldiers of Rhûn are one of Mordor's reliable defenses against cavalry because although Trolls are very good against all troops, they cannot be retreated quickly enough from any unit and are taken down too quickly by archers, especially if they have the Fire Arrow upgrade. If you send Trolls into thick combat or if there are more enemies than you anticipated, you may very well lose the whole unit. Even if you lose only one or two Veterans, you've lost a significant investment as Trolls are hard to level up. With the Soldiers of Rhûn, all you need is one Veteran squad member alive to eventually regenerate the entire unit.
Soldiers of Rhûn can draw arrow fire and are in that way good as cannon fodder, but overall unit survivability is very low against massed archers, and if your entire unit dies, you've lost all Veterancy with it. If you can protect yourself from cavalry tramples or quickly retaliate with a withering hail of arrows, Orc Hordes still have a better overall chance of advancing in veterancy from mission to mission.
Mountain TrollTrolls are versatile units, but generally far too fragile against archers (and especially fire arrow upgraded archers) to be worth the effort getting them veterancy.
When running to attack something, they can rush as fast as cavalry. They also trample infantry, so in some ways Trolls are basically Mordor's cavalry. Unfortunately, they have huge vulnerabilities to archers and fire despite having a lot of Health, and even without fire damage (which you will almost always see by mid-campaign), they die remarkably quickly against archers with no upgrades. And because they are monsters at 1 per squad, once they are dead you've lost the whole unit and any veterancy that it might have had.
There are three special orders you can give a troll, and all of them are mutually exclusive. If a Troll picks up a Rock, it gets one throw and can take no other order until it has thrown the rock. If a Troll picks up a Tree, it won't put it down until it is severely injured and goes berserk (whereupon it might put it down, but not always). A Troll can only eat an Orc if it has its hands free. An injured, berserking troll can sometimes still be moved and ordered to eat an Orc, which will restore its Health and calm it down.
All three orders require a lot of micromanagement, and typically you will have to select one troll at a time to give the order, or it may not work. Trolls need to be close enough to rocks, trees, or orcs in order to pick them up (or you can select a rock or tree for it to pick up; your cursor will change to a grasping hand). And even if they are right next to an orc, it may not pick it up until it stops moving, so don't count on in-battle snacks to heal your trolls. If you want to retain any veterancy at all with your Trolls, you will have to commit to a certain amount of micromanagement.
Trolls do more damage unarmed, but tend to hit more units with a tree. It can damage structures, unlike most units. Because it can trample infantry and needs to have its hands free to eat Orcs, you are probably best off leaving it unarmed or picking up a Rock for the one initial throw, although veteran trolls get better looking tree weapons (i.e., spiked clubs).
Trolls can knock riders off horses, but the extra time gained from the horseman having to remount isn't significant.
Veteran trolls regenerate and do not go berserk when severely wounded. They are more reliable, but still need to be used for very careful strategic strikes to clear an enemy position. They run only when you have set them to attack a unit or fortification, so you cannot expect to retreat them from anything in time. Otherwise, they do run fast enough to be cavalry, and because they can trample, run a gang of them at the last rank of the enemy so they've flattened all of them and can finish them off while they are getting up.
Drummer TrollThe huge bonuses given by a Drummer Troll will stack with other bonuses, making Mordor potentially very powerful in select conflicts where you stack all these bonuses together and somehow hold on to your units so they can earn veterancy.
They are less vulnerable than regular trolls, but you do need to keep an eye on them as they can attack -- If you hotkey them as part of a troop selection, and give that group an attack order, they will stop drumming and attack when they sight an enemy. In that case, you need to manually select them and give them a move order or stop order to cancel the attack.
MûmakilThe biggest and coolest unit, but also the hardest to keep alive and achieve veterancy. If you want to try it, pick one mission to churn them out until your Mûmakil Pen is level 3, whereupon you can get level 2 Mûmakils.
Like all 1-unit squad monsters, once it's gone, it's gone with all it's Veterancy.
If you are not aiming for Veterancy, you should treat them as Siege Weapons and deploy them only when safe. Fire arrows are particularly deadly an can kill one in a remarkably short time. Even if you can retreat one, there's no point unless you can somehow heal it (Veteran units will heal on their own).
Mûmakils can hold any single, un-merged squad of infantry. If they happen to have ranged attacks, the howdah becomes a firing platform. Otherwise, the units are just being transported to a strategic offloading location. Remember to Evacuate the Mûmakil because if it dies, all units being transported are also lost and anything underneath and nearby will probably be crushed when it falls.
Mûmakils are hard to use in battle because they are tricky to move about. They often turn unpredictably because very big units have to give way to other units, or other units have to give way to them (although in the mess of melee, sometimes you will see two Mûmakils occupying the same location because there are just too many units about). Further, if you move your Mûmakil and your own units are moving out of the way, they are not fighting -- moving units do not fire or fight. This can make moving a Mûmakil in the thick of combat a liability for other units.
Also, when a Mûmakil attacks in melee, it has a stomp that hits a fairly wide arc -- including friendly units. So, depending on whether you are hoping to keep your Mûmakil around for Veterancy or are willing to sacrifice it to spearhead an assault, you can either put it in the back and add its howdah firing platform to support your troops; or you can keep them moving, trampling anything that gets in the way and breaking up enemy ranks for your archer follow-up to finish off.
A Mûmakil is the only unit that can Trample a hero, and can typically kill a hero outright in this way. Trampling and keeping a Mûmakil moving is generally safer than using its attacks, especially when you have friendly units nearby.
If you are besieging a walled city, watch for traffic jams. Either send your Mûmakils in one at a time (and take them deep in, focussing on trampling enemy units coming out of buildings) or have them take down walls and make their own entrances while your army enters in some other direction. While they are behind a wall, the enemy will probably ignore them as they are busy with the rest of your army choking the entrance.
Be careful if two Mûmakils are attacking buildings near each other. They do area-effect damage and can easily hit each other for massive damage.
This area effect damage can be turned to your advantage: If you attack a wall, you can sometimes hit the building behind the wall. Aim your Mûmakil so that the Mûmakil, the building, and the center of the base are all in a straight line; this will have your Mûmakil on the outside of the base be at the shortest distance to the building.
Although Mûmakil can have fire archer orcs on the howdah, it did not appear that they fired more than five or maybe six arrows (on a howdah there are six orcs plus one banner bearer who does not attack). Since orc archers do a base damage of (10 + 15 fire) = 25, even if there were 10 archers firing, this is still only 250 damage, and only 100 if the enemy has a Heavy Armor upgrade and is immune to fire.
Haradrim Lancers do a base damage of 40 on a howdah, and do not rely on fire, so they always output about 200 damage. Because they are only 10 Command Points (versus 30 for Orc Archers), we chose to put Haradrim Lancers on our Mûmakil.
That said, sometimes the AI can build a trebuchet on a destroyed section of Gondor wall. Normally, when the trebuchet is on a tower, one or two smashes from a Mûmakil will destroy the trebuchet. When the trebuchet is on the ground and there is no tower, the Mûmakil can attack it but not do anything to it, and it is resistant to arrows (but quickly destroyed by fire arrows).
Archers on a Howdah do not regenerate units until they dismount. Orc Archers are ten per squad compared to Haradrim Lancers, which are only five, and theoretically take less micromangement.
Mûmakil can trample horses and heroes, usually instantly killing both.
Mûmakil can frighten non-Veteran units, rendering them impotent until they are attacked. This is very valuable in a siege as new units do not start a Veterans, and are therefore frozen until the AI can buy them the Banner Bearer upgrade.
Battering RamThe special Battering Ram,
Grond, is available only in the Evil Campaign, at the siege of Minas Tirith. Unlike a regular battering ram, it cannot, however, attack anything except the gate of Minas Tirith.
CatapultProbably the best weapon in all of Mordor's forces, and in the Campaign, the last one you want to use extensively because it has no levels, gains no Veterancy, and does not follow you to the next mission. One of Mordor's great advantages is in getting Experience quickly with Drummer Trolls, and all of this is wasted on a catapult.
Unlike Isengard's massive Ballista, the Catapult is small and relatively maneuverable. It cannot trample anything, so it is even more vulnerable than the Ballista (which can trample infantry). But it fires quickly and has a much smaller turning radius, so you actually have a chance of retreating it to a different firing position and setting up to fire again.
It also has two modes of fire: The regular exploding pitch and a plague-tossing Release the Prisoners.
The first inflicts impact and fire damage instantly, often killing infantry in one blast. You may have to micromanage its fire to hit the centre of a unit, however.
Release the Prisoners fires plague-ridden bones that will cause non-veteran (level 1) units to flee. It inflicts damage over time, and does not hurt your own units, although it can still cause your own units to flee. It also does no damage to structures.
A group of 5 Catapults can be more or less left alone to handle any archers that do not have Fire Arrows, as archers will tend to stand still and return fire, which means they are sitting ducks against the catapult's superior area effect firepower. Meanwhile, the Catapult takes very little damage from arrows without the Fire Arrow upgrade (which can do a lot of damage to them). Once the enemy has Fire Arrows, it will start upgrading all its troops with them before sending them out.
Siege TowerThese can trample infantry.
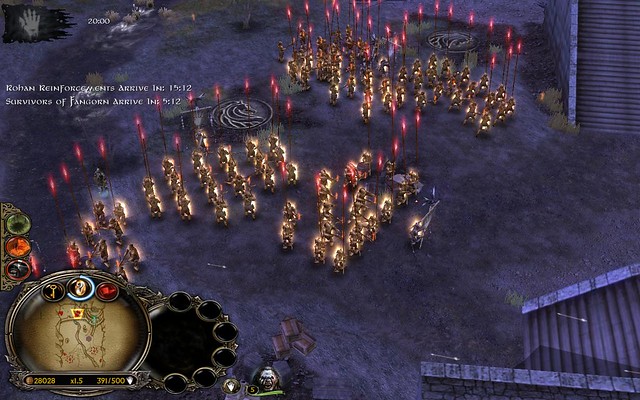
Playing MordorFor the Evil Campaign, there are only two mission where you have to play Mordor. The final mission in the campaign (siege of Minas Tirith) is a Mordor vs. Gondor map, but you can bring in Isengard troops.
I recommend against playing with Mordor because they have no heavy armor against fire arrows and by the mid-game, the enemy will have that very consistently if not always. Also, they are hard to protect against cavalry charges, so building veterancy will be hard not because experience points are easy to come by, but because you are likely to lose whole units very quickly.
Also, Mordor generally does not have any access to heroes during the Evil Campaign.
Fighting MordorWatch for the big units coming to break up your ranks. In the Good Campaign, Mordor gets free veteran trolls and they are hard to deal with when they rush. If you can sneak up on them (their sight range is less than that of your archers), you can quite safely take them out without them moving against you.