Star Wars: Empire at War - Carida
This is a hint / walkthrough for a planet in Star Wars: Empire at War. The index of all our guides for Empire at War is here.
Rebellion Campaign
Carida is the site of Mission 10 (Handle with Care!)
When the mission is announced, you are told to move the Millennium Falcon to Mon Motha. However, as soon as you move Mon Motha from wherever she is located, the mission is initiated and after dialog you are you are automatically taken to a special land map with only Han Solo and Chewbacca. There is no Space Battle. Shortly after Mission 10 is completed, Carida is given over to Empire control with no space station and no ground buildings.
After Mission 10, the Rebellion Campaign moves very quickly and there is hardly any time to build and move things around, so if you want to amass a huge fleet and build up your space stations, do so before starting this mission.
Land Battle
This mission is essentially linear with prompts by the heroes as to what to do. Here are some things you might want to do to deviate from the prompts:
- There is a Build Pad near the TIE Mauler parking lot, so build a Bacta Healing Tank to first heal Han Solo and Chewbacca from any injuries sustained from the infantry and Anti-Infantry Turrets, then swap it for a Vehicle Repair Station. Move Han Solo to the alley where the Anti-Infantry Turrets were located and let Chewbacca handle things for a while.
- When you first get Chewbacca into a TIE Mauler, use it to run down as much infantry as you can. If you draw the attention of a AT-ST Walker, retreat back to the Vehicle Repair Station and engage it there. The continuous healing should let you out-last the Walker.
- Once you get into the AT-AT, you need to have Han Solo help Chewbacca with infantry. You'd be surprised how quickly two squads of infantry can damage the AT-AT. Keep the AT-AT repaired because you want to use it for the remainder of the mission. You are provided with Saber Tanks later, but those can be even harder to use against infantry.
- Watch for the Turrets to rebuild themselves once you get to the Turbolasers. Sometimes they will immediately rebuild when you've destroyed them, so be cautious. Double back and destroy them before finally moving to the storage area for the data.
After Mission 10, Carida starts with no space station and no ground buildings, but has a garrison including one AT-AT.
Very shortly after you land reinforcements, you will be relentlessly swarmed, although the Imperials are also fighting Rancors. Run north east immediately to secure the two Build Pads around a dugout, and make them Vehicle Repair Stations. Arrange your forces and hold out. You will probably need at least one, if not two, units of Mobile Proton Torpedo Launchers (total 4 vehicles plus Spotter Droids).
An alternative to frantically looking for cover when you land is to send down just one unit (two individuals) of Rebel Infiltrators. Run them west and take down only Scout Troopers who follow you. Build a Bacta Healing Tank at the western end of the beach and make that your temporary base while you run back and forth along the beach helping the Rancors from a safe distance. The Rancors move slowly and like all units, quickly lose interest if you are out of their line of sight.
Be cautious of attracting the attention of the AT-AT, although Rancors can do massive damage to them, and they are likely to get their head stuck in the Rancor cave, and be unable to turn, and therefore helpless.
If you go past a building, either drop a Thermal Detonator or call a Bombing Run. When the landing zone is reasonably quiet, call down the rest of your troops.
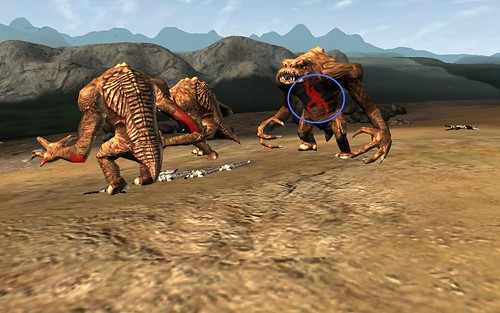
If you watch the Rancors fight Stormtroopers, they sometimes pick one up and swallow it. Because of shading when enemies are behind an object, you can actually watch the silhouette of a Stormtrooper going down head-first inside a Rancor, as in this screenshot...
No comments:
Post a Comment